Composting guide: it’s possible at the campsite!
Why do we offer a guide to composting at the campsite?
Because since January 1ᵉʳ, 2024, in accordance with European law and the 2020 anti-waste law, sorting bio-waste at source has become widespread, for both private individuals and professionals!
The recycling of biowaste at the campsite is therefore a matter of course, and is already in place at our sites, which now offer a composting area for campers and staff alike. In fact, two of our staff have taken a diploma from EBE l’abeille verte to become referents.
Today, we sort as much of our organic waste as possible to reduce the amount of household waste and nourish our soils. It’s a win-win situation, both ecologically and economically!
Why is composting important?
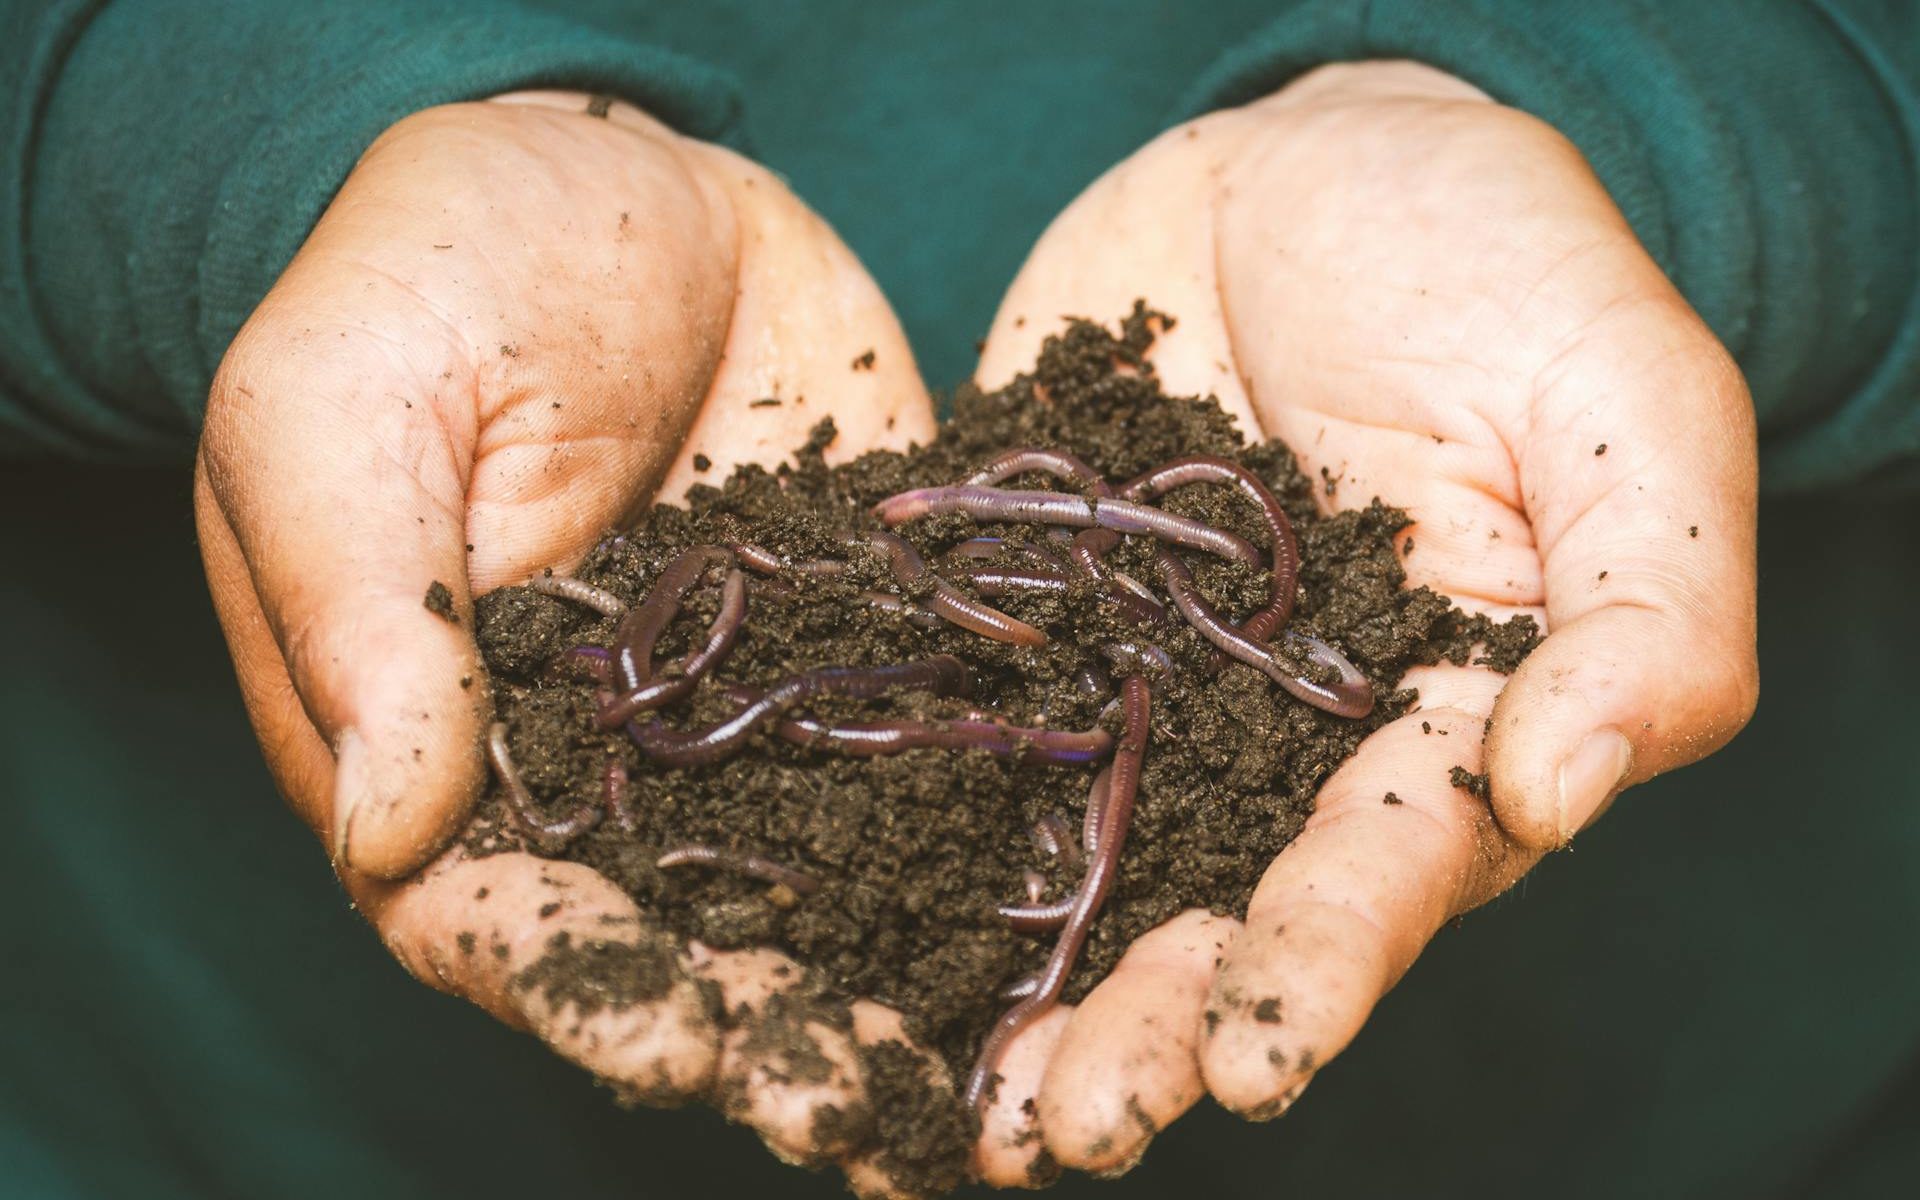
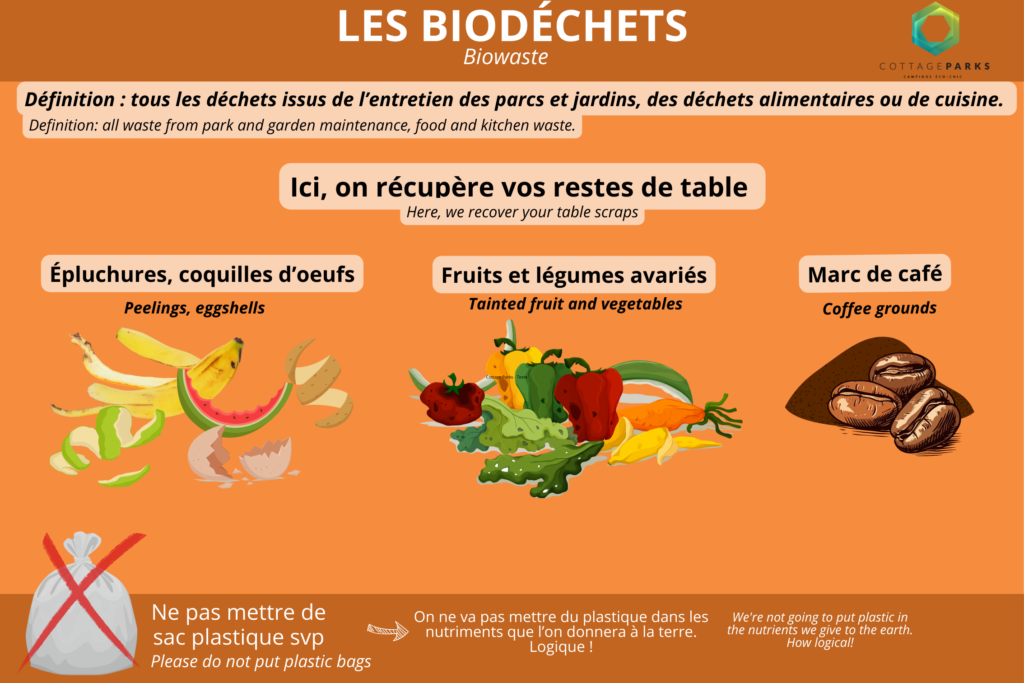
Composting is a way of recovering bio-waste, such as food and garden waste.
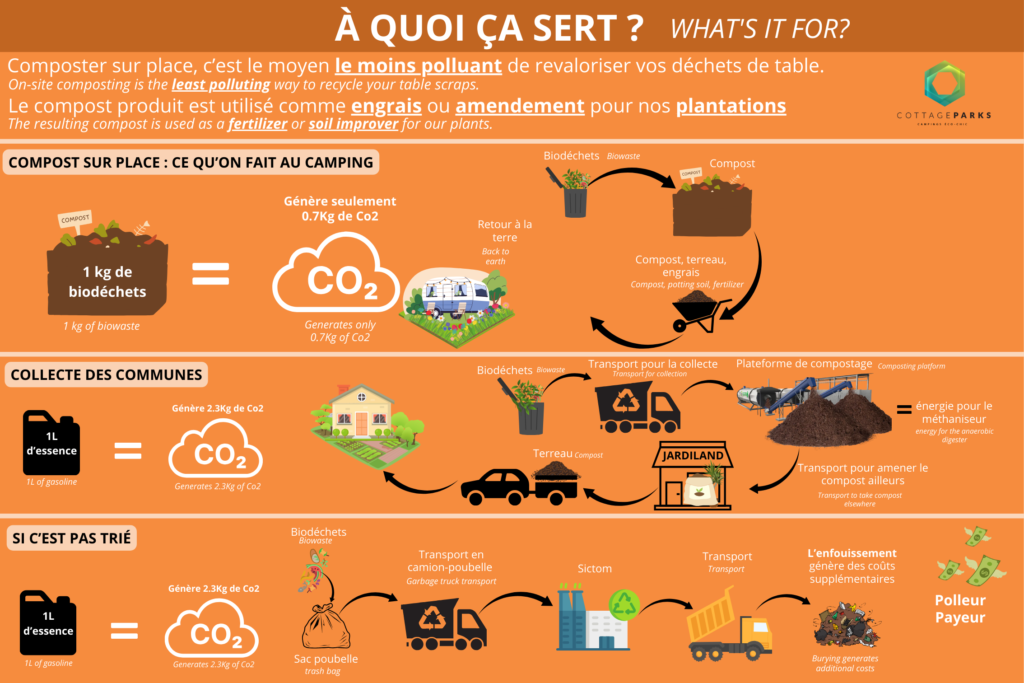
This organic matter returns to the soil, avoiding disposal by landfill or incineration.
The compost produced reduces the volume of household waste by around 30%, beautifies the campsite’s green spaces (among other things) and helps reinforce the positive image of the establishment.
Read also: What are the advantages of eco-friendly camping?
Steps to set up a collective composter at the campsite
To install a collective composter on a campsite, you need to take your time, think about its size and location, and make it practical for everyone to use.
1.
Estimate the size of the composter
2.
FIND THE RIGHT LOCATION
First of all, campsite managers need to determine the potential waste litter to properly size the composting area. The more sophisticated will base their calculations on the volume of waste from previous years, or ask for an audit.
But others recommend a simple calculation:
Composter volume = number of spaces x 5.
If the composter fills up too quickly, you’ll need to provide an extra one as soon as possible.
Select a location between sun and shade (to manage humidity), on the ground (so that small animals can get in easily), close to garbage rooms and a water point (for watering or rinsing tools and buckets).
The area must also be far enough away from dwellings and customers (to avoid odor and pest problems), but clean, discreet and accessible.
3.
Provide a bin for shredded material
4.
Give biobuckets to customers
Plan and indicate the location of a bin dedicated to structuring matter (mulch, branches, dead leaves, dry grass, sawdust, etc.).
Provide your customers with collection bins so they can easily store and transport their biowaste from their pitch to the campsite composter.
Tips for maintaining your compost bin at the campsite
Maintaining a collective compost bin on a campsite requires a little time and a lot of attention, but shouldn’t impact your schedule too much in the high season, as most of the heavy maintenance takes place in the autumn. Here are a few tips for successful composting at your campsite.
1.
Balancing intakes
2.
Building the compost heap
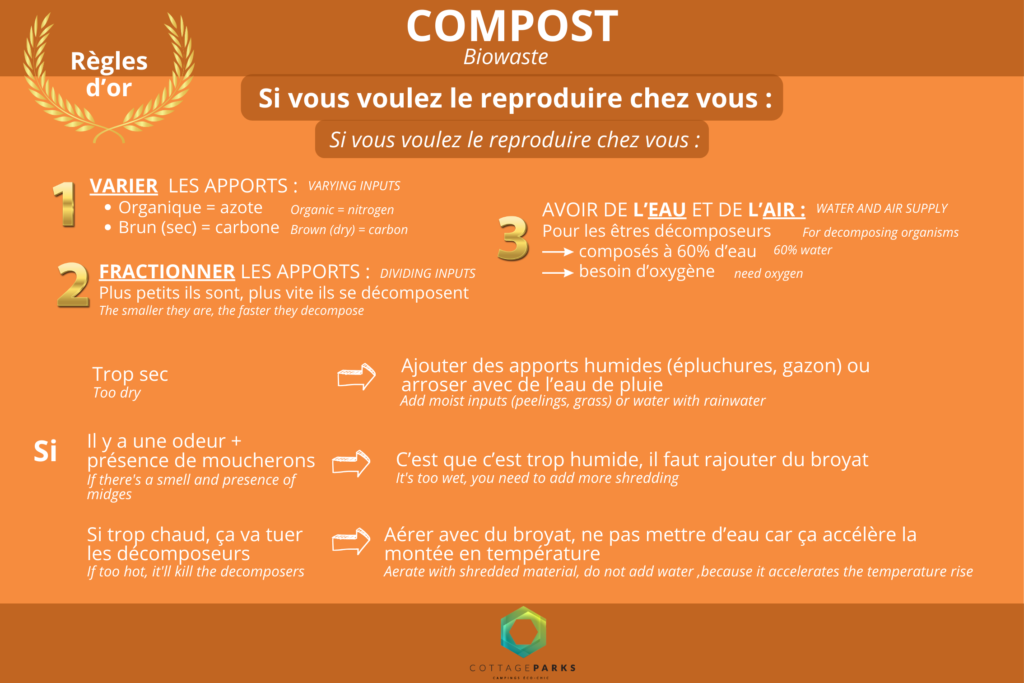
For effective composting, you need two types of materials:
- green matter (rich in nitrogen) such as fruit and vegetable peelings, leftovers and garden waste;
- brown matter (rich in carbon) such as winter prunings, twigs, wood shavings and sawdust.
A good balance between these two types of material is essential.
Start by placing a good layer of structurant (i.e. brown material) at the bottom of the composter to absorb the moisture of the first bio-waste and help the compost get off to a good start.
Then alternate layers of green and brown material to promote decomposition.
Take care not to pack the compost too tightly, as air is necessary for the micro-organisms to do their work.
And don’t forget to use a shovel to divide up your food regularly (a nod to the watermelon, a favorite fruit of holidaymakers).
3.
Monitor humidity
4.
Aerate the compost
Compost should be moist, but not soggy.
If the pile is too dry, add a little water or green matter.
If it’s too wet, add brown materials to absorb excess moisture.
Encourage campers to follow these good practices with the help of notices.
Stir the pile often with a compost stirrer to aerate it and avoid unpleasant odours.
Oxygen accelerates the process of decomposition and fermentation.
5.
Turning the compost
6.
Using compost
Take advantage of the autumn to turn the mixture obtained during the high season, to help it mature. After several months (around 4 to 5), your compost should be ready to use (it’s dark in color and smells like undergrowth).
It can be used as a fertilizer (to supply plants with nutrients) or as asoil improver (to improve the condition of your campsite’s soil). At Cottage Parks, we use it in shared planters, but also in hedges, around trees and especially, out of season, where tents have been damaging the plots all summer.
The tools you need to compost like a pro!
Here are a few tools to help you maintain your compost:

- a hook or rake to aerate the surface of the compost;
- a shovel to pour the shredded material into the composter;
- a Brass’Compost and/or a fork to aerate the compost in depth;
- a thermometer to monitor temperature.
NB: At first, the compost will be at room temperature, then it will reach a peak (in our case, 70°C), before dropping back to 40°C (hygienization is then complete).
Don’t forget to publicize your action!
Here are a few additional tips for promoting and communicating your composting project, so that it is both effective and worthwhile:
- Appoint composting referents at the campsite;
- Raise holidaymakers’ awareness with simple, clear information at reception, in the garbage can, next to the composter and when you meet them at the composting area;
- Indicate the location of the composter on the campsite map and on signposts;
- Organize events, especially for children, on waste management (in our case, our mascot Cotti is in charge).
Marina, one of our referents, tells us more in the video in this article about waste management at La Clape campsite.
Composting at the campsite, a win-win situation
Household waste management represents a significant cost for a campsite. It is also an essential lever for environmental protection.
The benefits of composting at the campsite are manifold: there’s less waste and therefore lower taxes (that’s the economic benefit), the campsite environment is improved (the soil is regenerated) and eco-responsible tourists are satisfied (and we’re not just talking about the tomatoes and zucchinis they find in their driveways). Don’t hesitate any longer!